Create users in bulk
SmartWinnr allows you to upload a CSV file to upload users in bulk. This is useful when you have a large number of users to be added or modified. Email id is the key with which SmartWinnr searches existing records in the database. If the system finds existing records, it updates the record from the value in the CSV. If no existing records are found, then the system creates a new user.
Step1:Create Users In Bulk
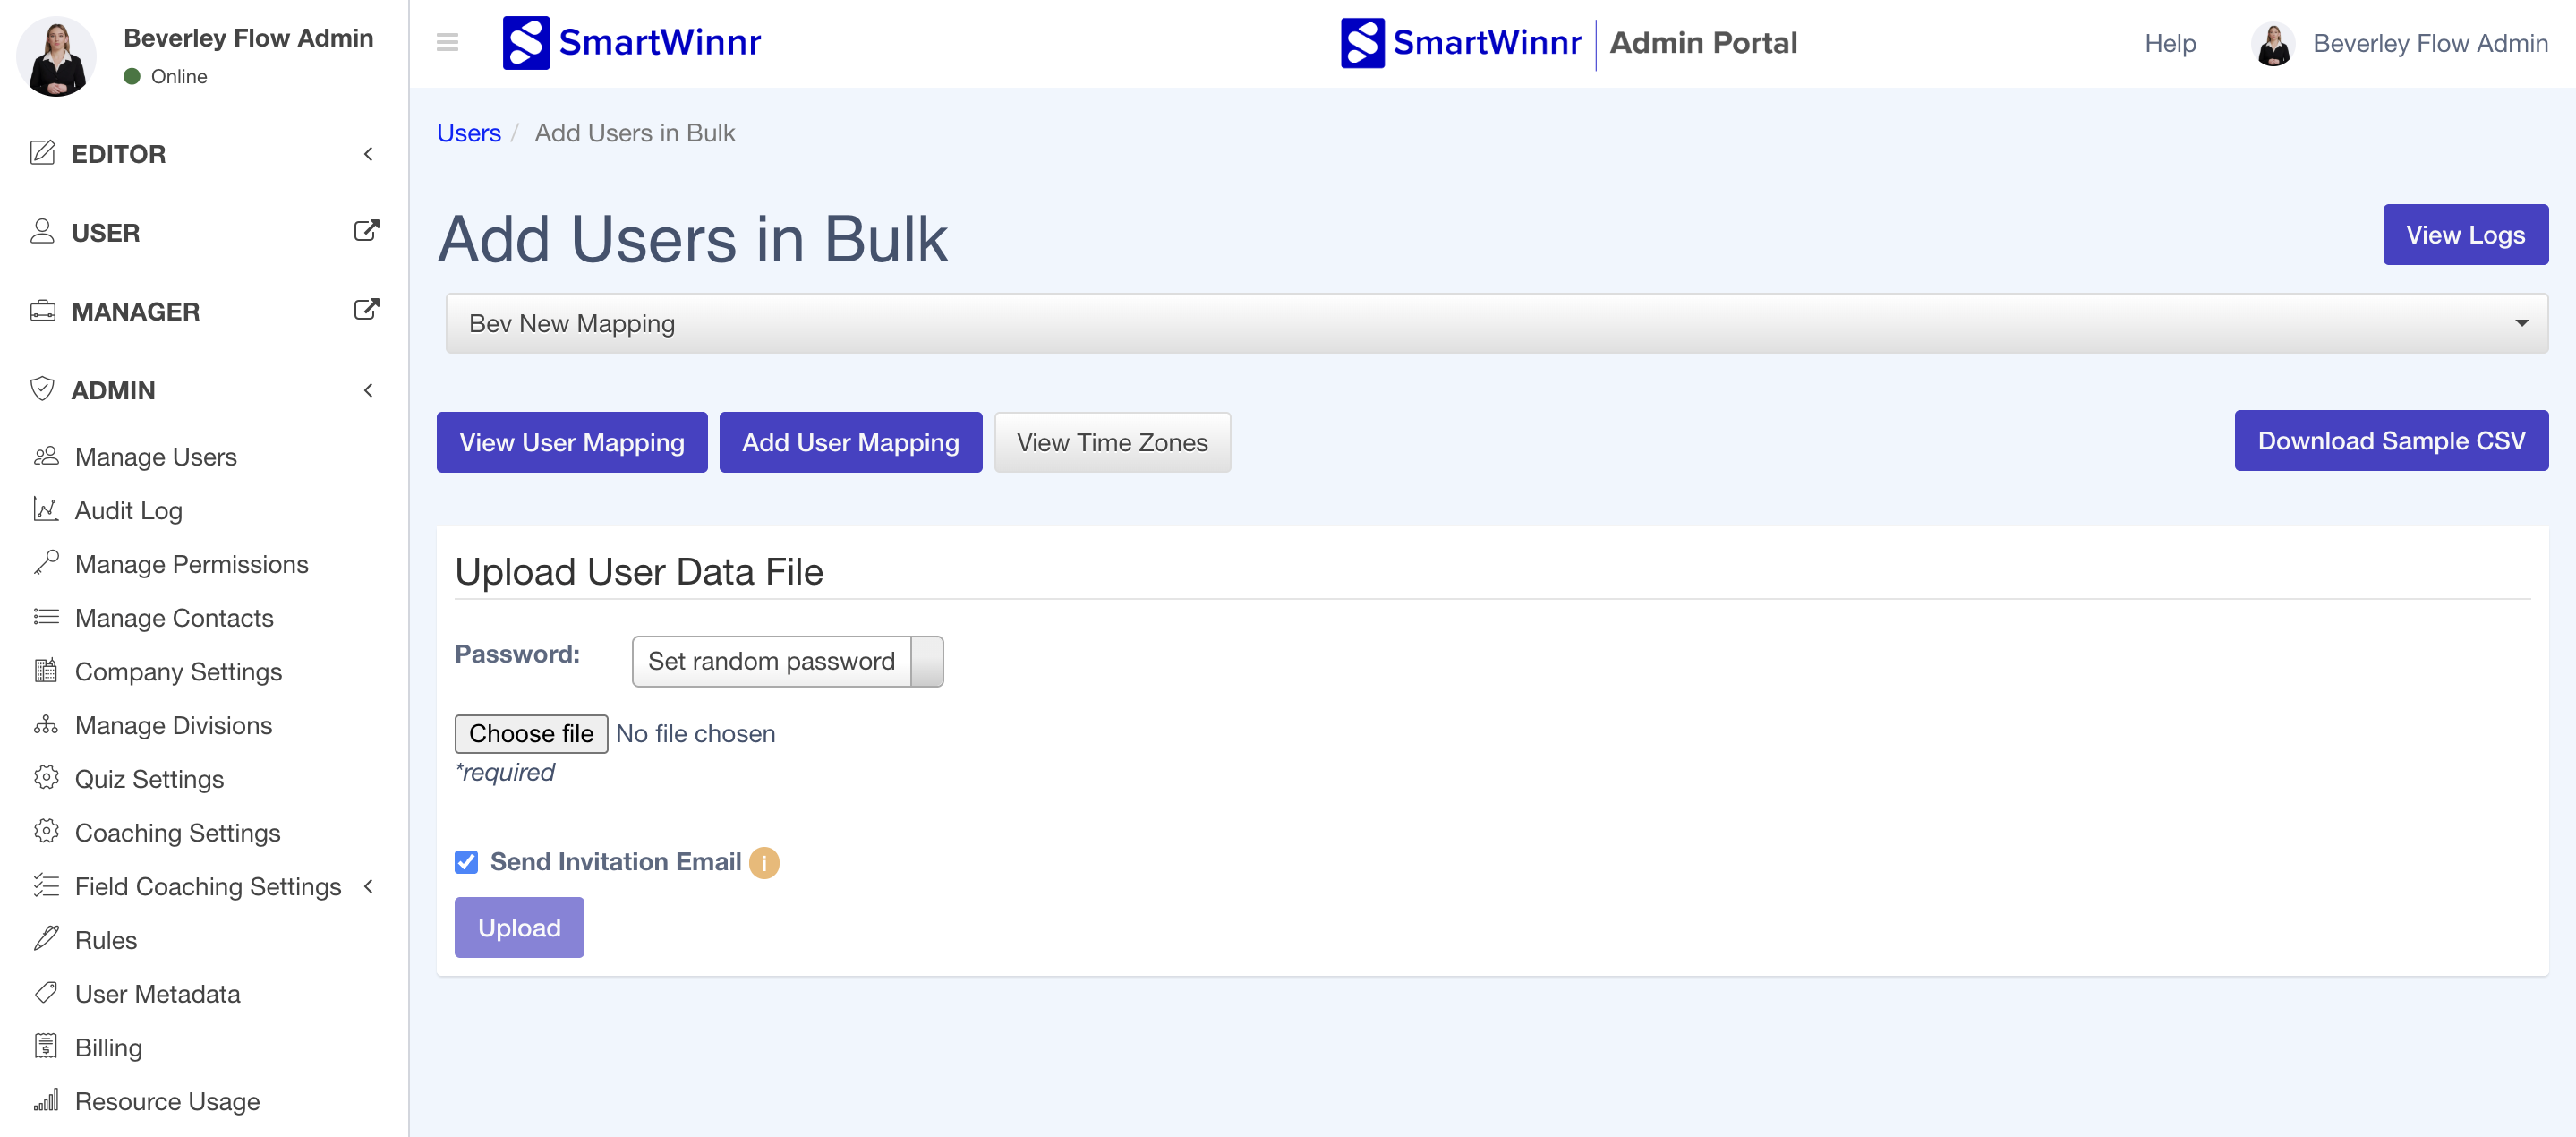
Go to ADMIN > Manage Users. Click on the “Add Users in Bulk” button from the hamburger menu.

Step 2: Check and Map the File Sample
After initiating the bulk user upload process, verify and prepare the CSV file using the steps below:
Default Mapping Selection
- The default field mapping for your organization will be automatically selected in the top drop-down.
- If the correct mapping is not selected or available, please contact your system administrator for assistance.
Download the Sample CSV
- The uploaded file must follow a specific format.
- Click on the Download Sample CSV button to download the standard template.
The file needs to be in CSV format. For best result, save the spreadsheet as CSV UTF-8 (Comma delimited) Without UTF-8 encoding, non-English characters in the file might not display correctly.
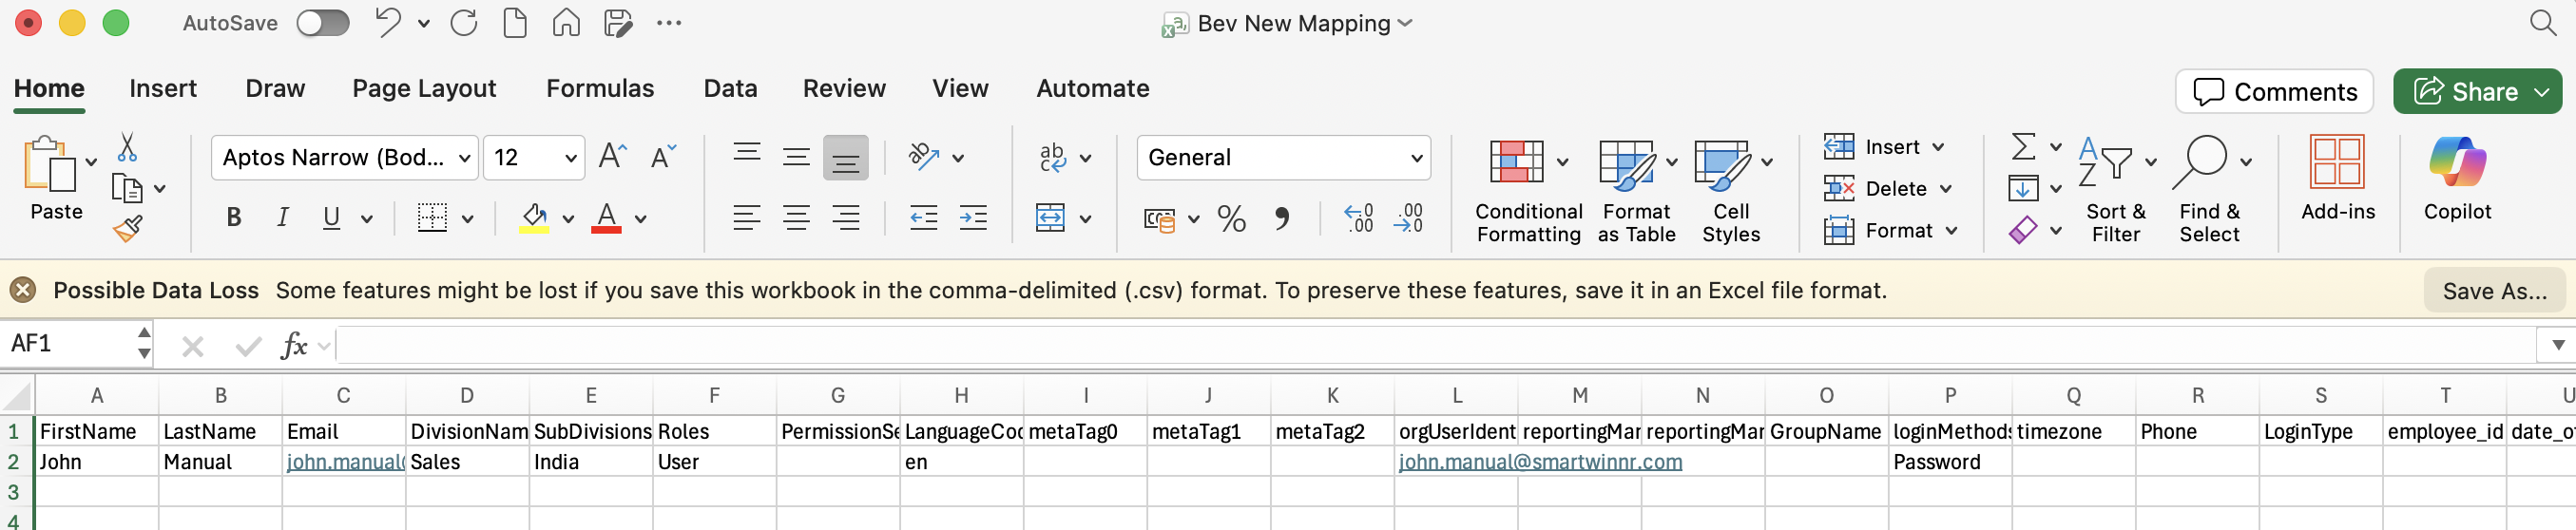
Fill in User Details
- Open the downloaded CSV file in Microsoft Excel or a compatible spreadsheet application.
- Enter the user details as required.
- Ensure that all mandatory fields are filled correctly to avoid validation errors during upload.
Important Notes
- Follow the column structure exactly as provided in the sample file.
- Do not modify or delete column headers.
- Incomplete or incorrect data may result in upload failures.
Once the CSV file is correctly filled and validated, proceed to the next step to upload the file.
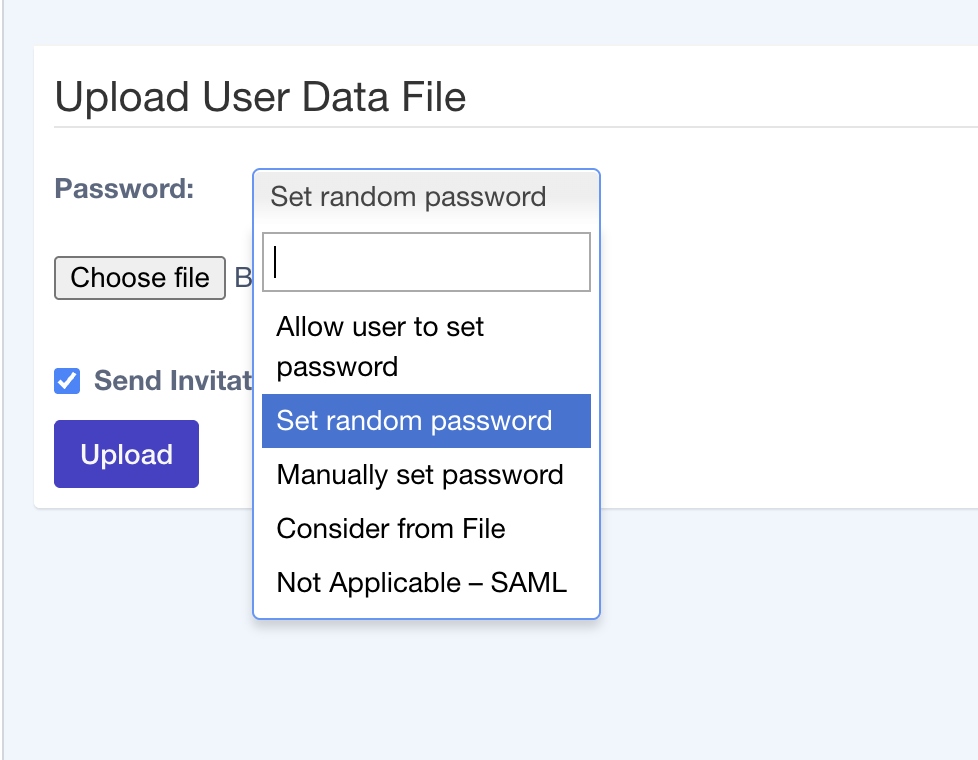
Step-3. Set Password Options
During user upload or creation, SmartWinnr provides multiple options to configure user login credentials. Administrators can choose the most appropriate option based on security policies and onboarding requirements.
Available Password Options
1. Allow user to set Password
-
An activation email is sent to the user’s registered email ID.
The user must click the activation link and set their own password.
Until the account is activated by the user:
- The account remains in Inactive status.
- The user cannot be assigned quizzes, surveys, or SmartFeeds.
- This option is recommended when user-driven activation is preferred.
2. Set Random Password
-
The system automatically generates a password based on the organization’s password policy.
The user account is activated immediately.
A welcome email is sent to the user containing:
- Username
- System-generated password
- Users can be assigned quizzes, surveys, and SmartFeeds immediately after creation.
3. Manually Set Password
- The administrator manually defines a password for the user during creation.
- The account is activated immediately.
- Login credentials can be shared securely with the user by the administrator.
- Recommended for individual user creation or controlled access scenarios.
4. Consider from File
- The password is taken directly from the uploaded file during bulk user upload.
- Each user can have a unique password defined in the file.
- Accounts are activated immediately upon successful upload.
- Administrators must ensure the file follows the required password policy.
5. Not Applicable -SAML
- This option applies when SAML (Single Sign-On) is enabled for the organization.
- Passwords are not managed in SmartWinnr.
- Users authenticate using their corporate SSO credentials.
- Password creation, storage, and security are handled by the organization’s identity provider.
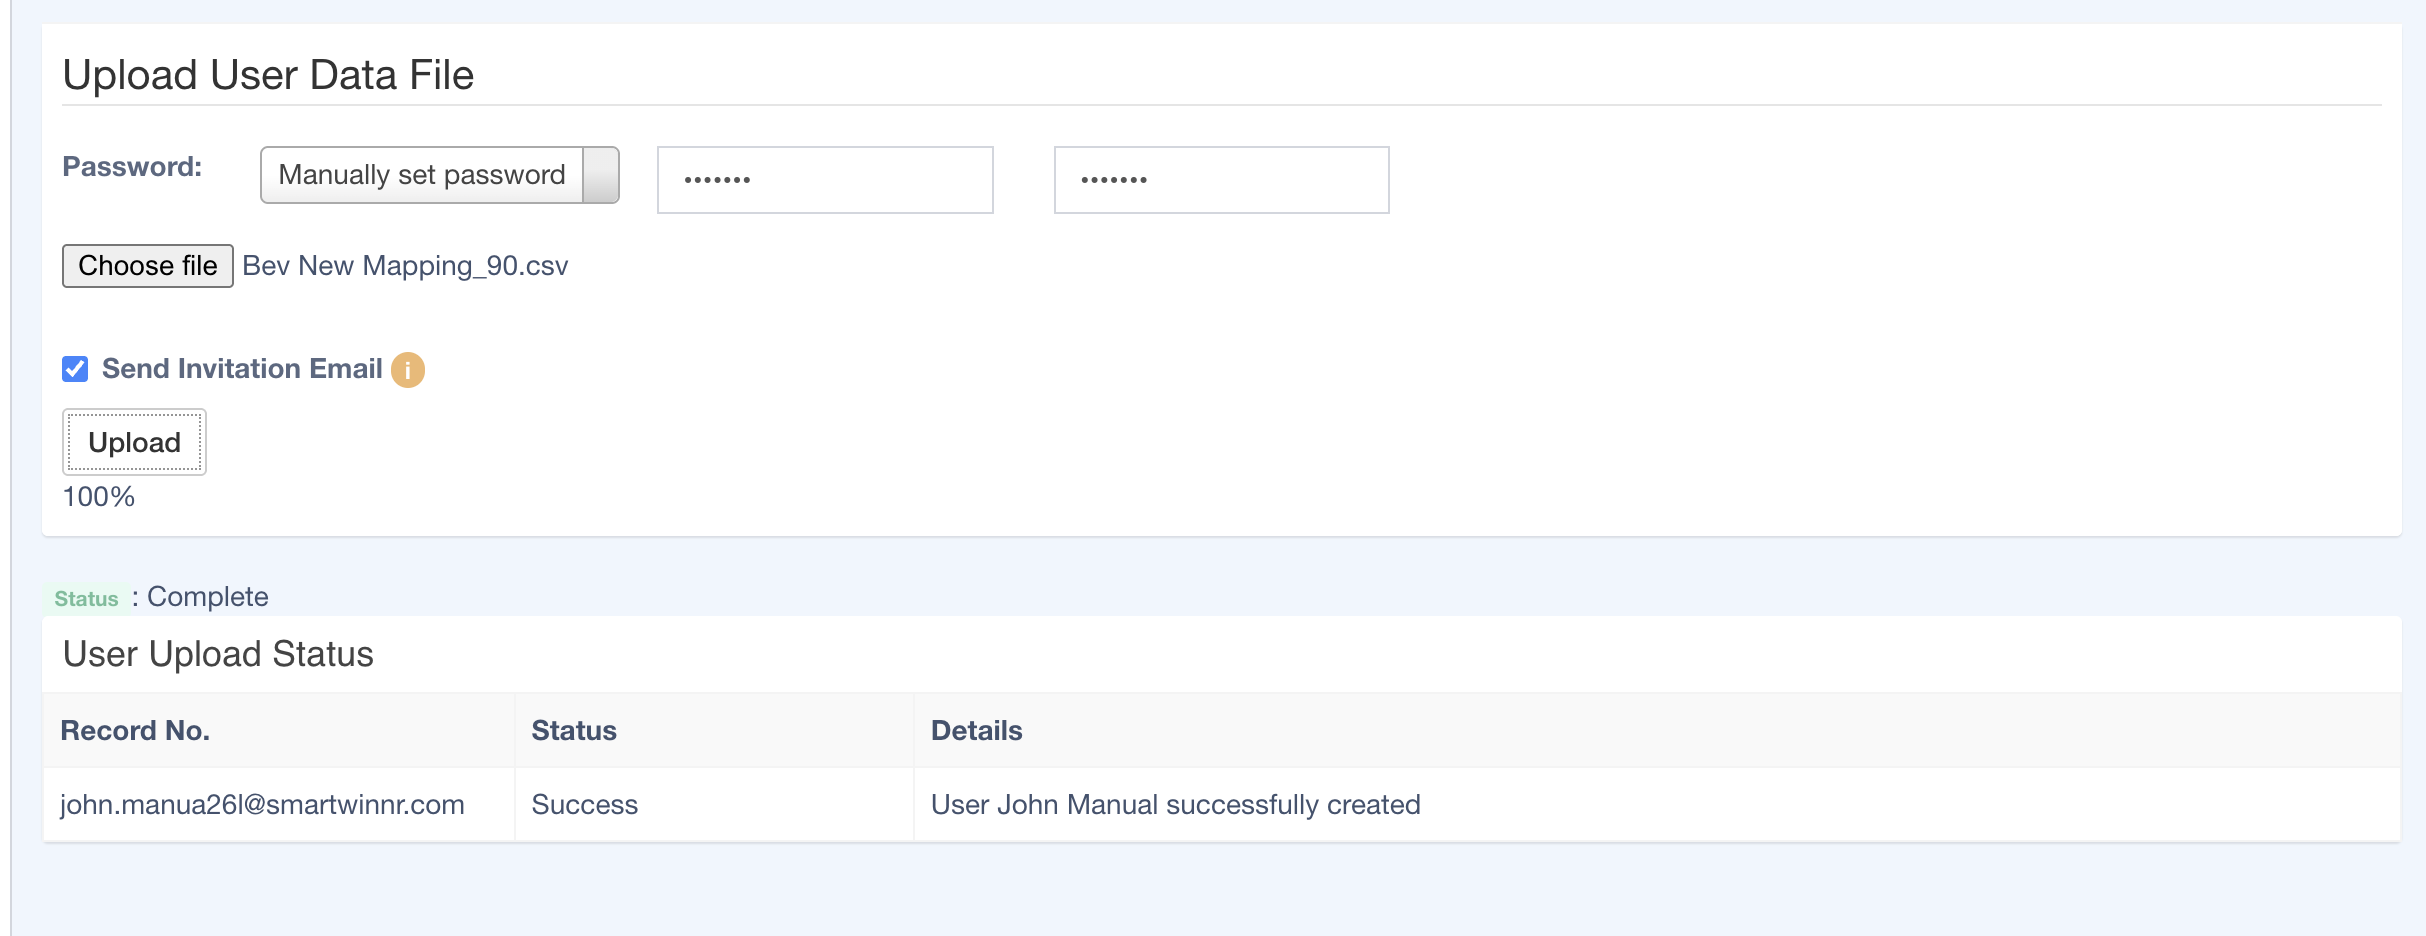
4. Upload CSV file
Upload the prepared CSV file to begin the bulk user creation process.
- Once the file is uploaded, the system provides real-time status updates on the processing progress.
- If any validation errors are detected (such as missing mandatory fields or incorrect data formats), the system will clearly display the error details.
- You can correct the errors in the CSV file and re-upload the file without restarting the entire process.
- After the upload is completed successfully, the user creation details and status will be displayed on the same page for your reference.