
How to Create a form?
To create a form in SmartWinnr, go to Editor >>PERFORMANCE >> Forms >> View All Forms. It will take you to the following page where you can see the list of forms created by you.
Click on Create Form option at the top-right corner to create a new one. It opens the Create Form page.

It will take you to the following screen where you will fill in the details for the Form.
Step-1: Add Name, Description, and Dates to the Form
Give a catchy name to your form and add a description. Also, set the start date and end date for your form. The form will become inactive and not be visible to the users once the end date is passed.
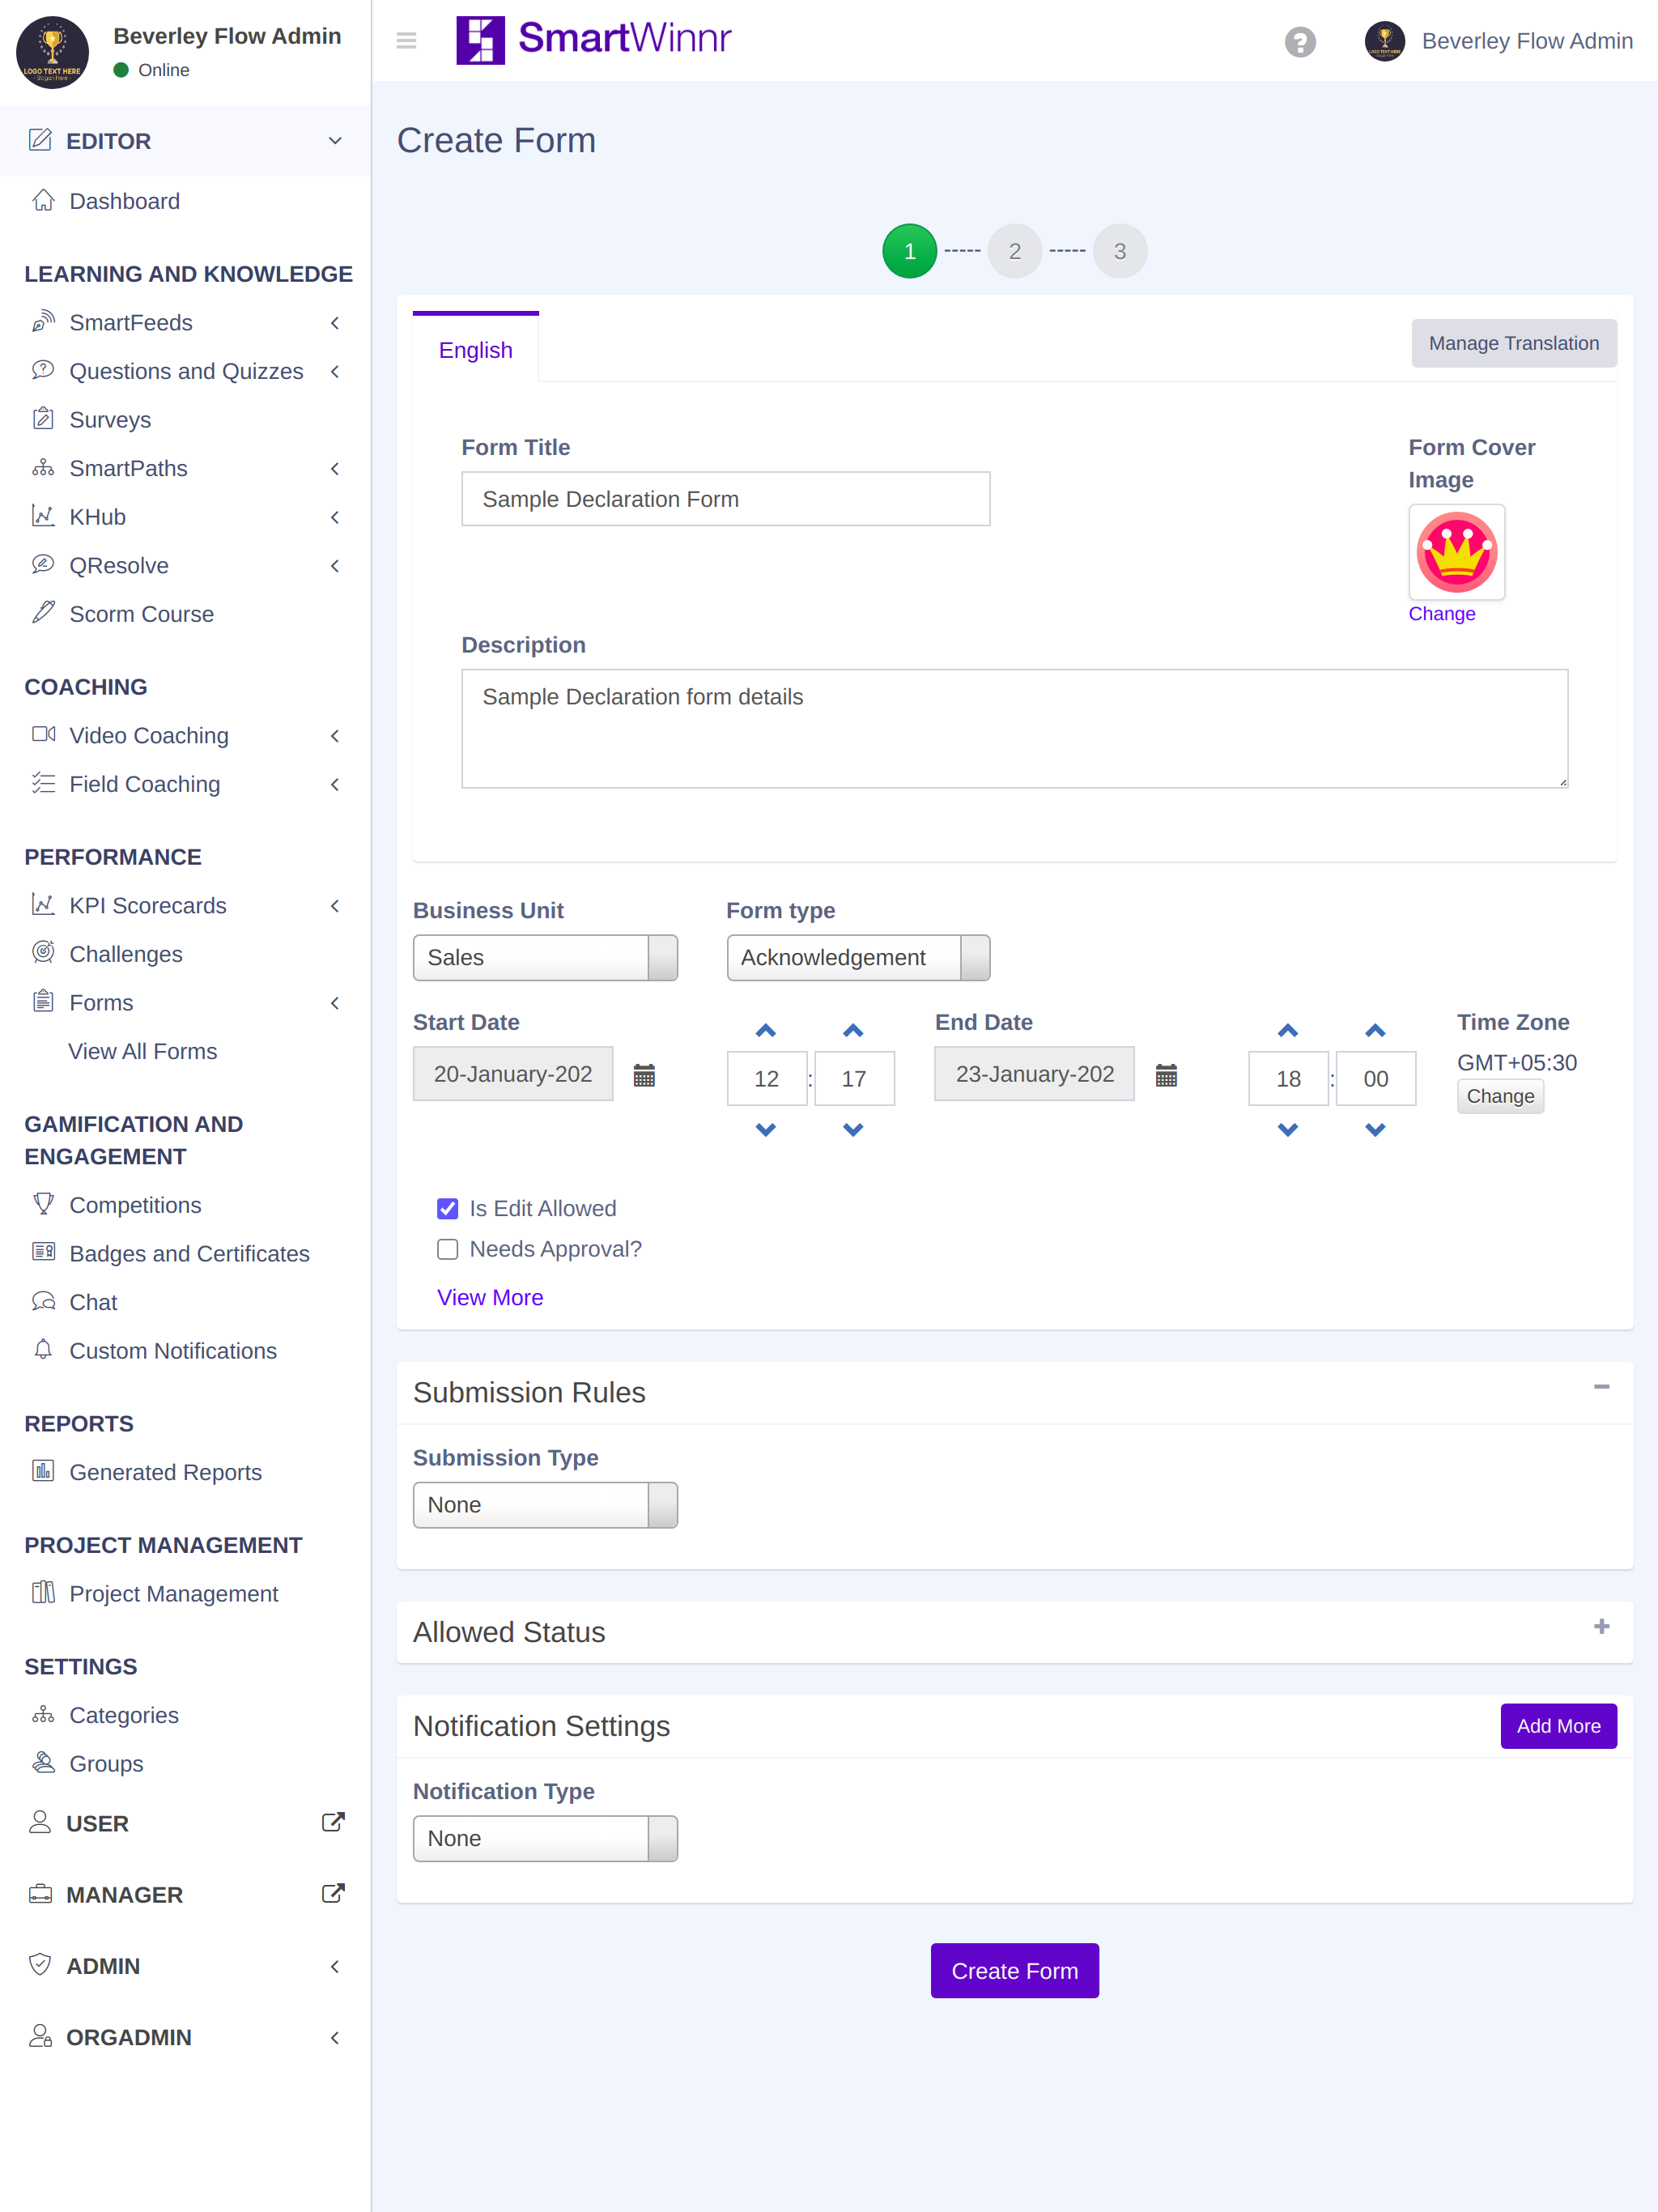
Form Type
SmartWinnr allows you to create two different types of forms. Following are the two types of forms:
- Acknowledgement
- KPI Value Submit Form
Acknowledgement Form
Acknowledgment Form is a declaration form that may be used to authenticate official documents.
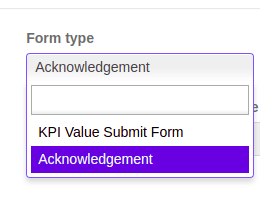
KPI Value Submit Form
KPI Value Submit Form is a type of Form which is used to submit KPIs at multiple levels to evaluate their success at reaching targets
Select the appropriate fields of use.

Needs Approval: Check this option, if you would like to add an approver to the form submitted by users. You can make any editors or the corresponding manager of each user as the approver.
Generate PDF: This option enables you to generate the form submission into a PDF format. Also, you can send the PDF automatically to the user by checking the option 'Send PDF To User Automatically'.
Allow Visibility of Submissions: This option helps the editor to see the form submissions of users.
Allow Comments: This option allows editors, approvers and managers to give feedback on their form submissions.
Show Comments to User: Check this option if you would like to show the feedbacks provided for the submissions to the users who made the form submission.
Allow Bulk Submission: This option helps the users to submit a number of forms under the same set together instead of submitting one by one.
Show Submissions To Managers: By checking this option, the respective managers of the users will be able to see the submissions of their reporters.
Editor Can Submit The Form: This option allows you to submit a representative's form in case if any of them face any difficulty in submitting the form.
Default Date Filter: This option allows you to set a default date range for the date filter. By default, the submissions within the specified date range will be visible to the approvers.

Submission Rules
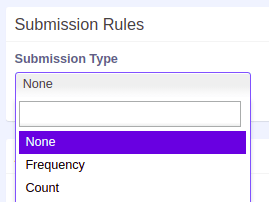

If you select 'Count' as the Submission Type, then you need to provide the maximum number of submissions allowed by each user for the Form.

Notification Setting

Step-2: Add Form Components
Once you have completed the first step in creating a Form, it will take you to the following page where you can add fields to the form.
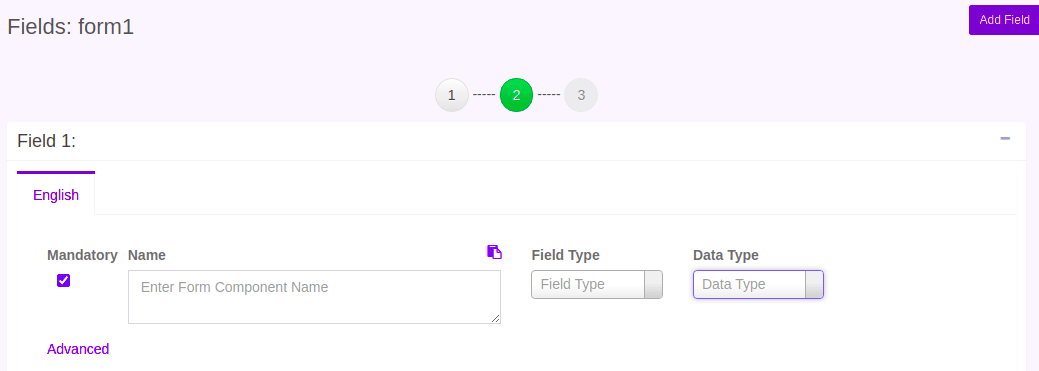
Advanced Form Options
Click on Advanced in the Form components
You get the following:
Keep Previous Value: This option will prepopulate the value which you selected in your previous form submission.
Form Location
- Via Left Menu >> Forms
- Via Chat
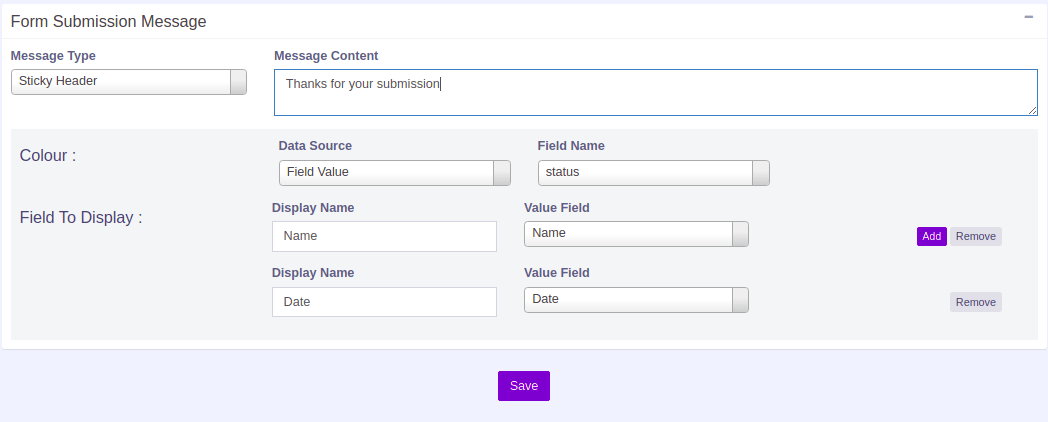
Pop-up message: Pop-up is simply a notification that communicates certain events to the user.
Sticky header: A sticky header is a navigation tool that fixes the menu to the top of the screen as the user scrolls down a page.

Step-3: Assign Users to the Form
The next step is to assign users to the form.Select the desired participants and add them to the form.

You can filter these users based on the Business Unit, Country, Group, Name, Email, and Meta Tags. Once you have selected the users, click on the " Send to Selected People" button.